How To Turn Google Calendars Into A Merch Calendar
There has been a lot of talk in the Merch Community lately about trends and holidays and for good reason. They are a GREAT way to tier up your account and what a lot of big sellers recommend that newer sellers focus on when first starting out.
So many people focus on holidays and calendar events that someone came up with the idea to charge people a monthly fee to use a calendar. The idea is to keep track of different events that might sell well on the Merch by Amazon platform, but with a monthly fee attached.
Josh Brown brought this to our attention a few days ago, and it is something we care deeply about. In fact, this is one of the reasons we keep this blog 100% free and try and update it as frequent as possible. YES we sell a software to help you with your Merch by Amazon journey, but our aim here at Merch Informer has always been to provide value up front with in depth guides and resources to give you the best chance at success on the Merch by Amazon platform.
With this being our goal, we reached out to Josh Brown (the creator of the video at the end of the article), and asked if we could publish a written guide because of the value it would bring. With his permission granted, the following is one of the best ways to set up your own calendar with every Merch holiday and event you could ever ask for.
Turning Google Calendars Into A Merch Calendar
The Merch community can actually create their own event calendar for FREE through Google Calendars. This will allow users to make sure they can plan well in advance when they should upload their designs for max visibility. Our recommendation has always been to upload around 60 days in advance of an event, but often times, we forget ourselves as the events creep up on us. This usually leads to someone on the team scrambling to get the designs completed and uploaded. The goal here is negate this issue!
Step 1: Open Google Calendar
You can easily reach Google Calendar by clicking on this link: calendar.google.com. Keep in mind that this will be the Google Calendar for whatever email account you are logged in with.
Step 2: Open Up Settings
From here, you will want to click the settings icon. This icon can be found in the upper right hand corner and looks like a little gear.
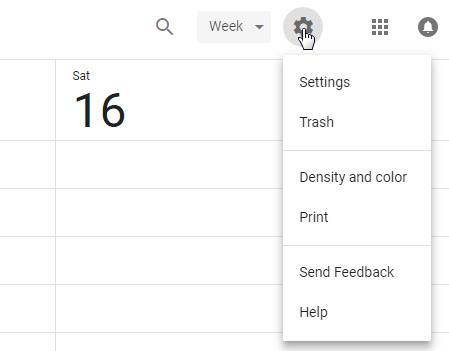
Click on the “settings” tab at the very top of that drop down menu.
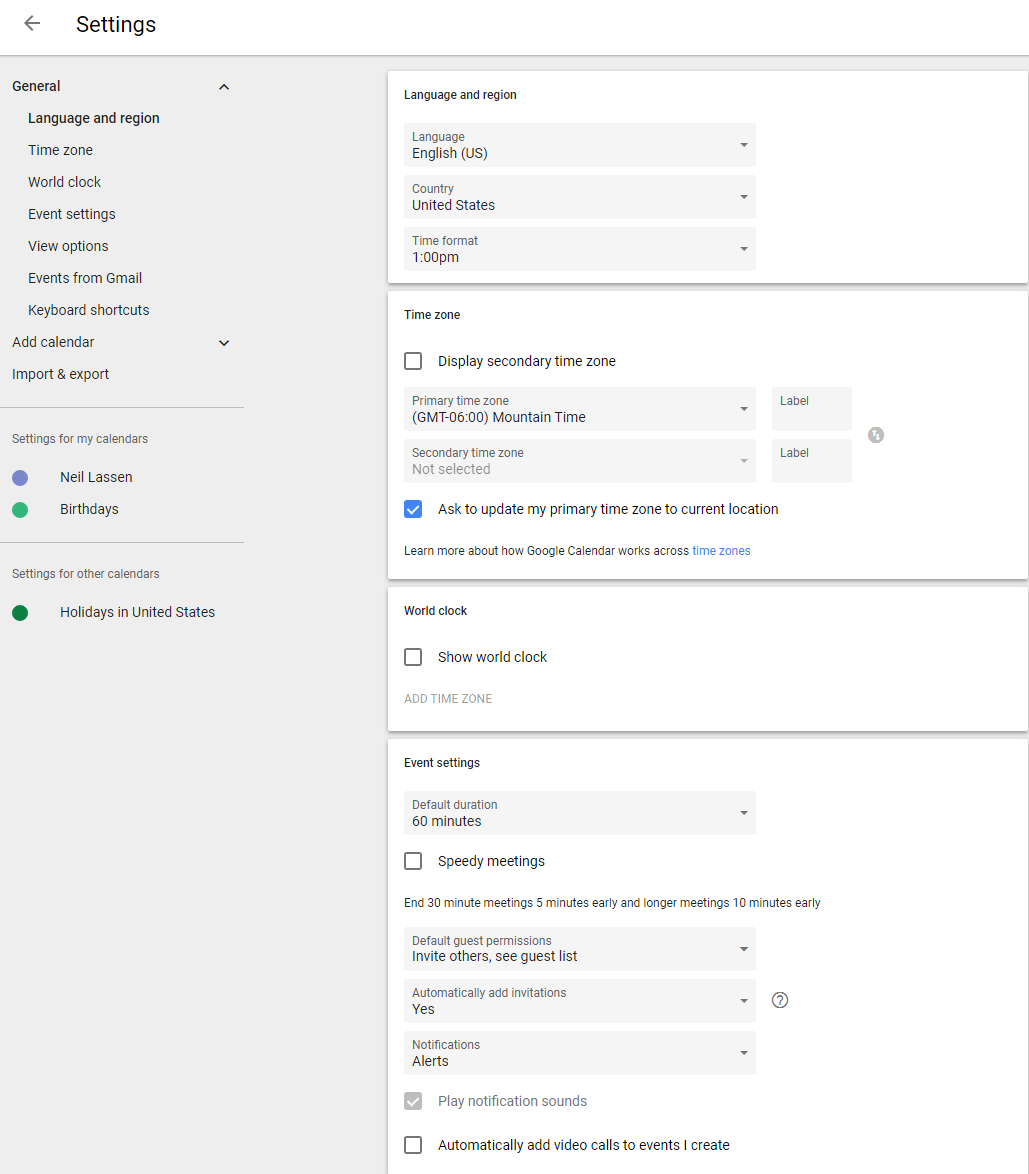
It will bring you to this page:
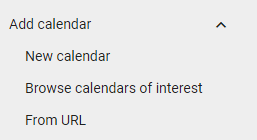
Step 3: Add Calendar
From here, click on Add Calendar in the menu to the left. This will open up a sub menu where you can then click on browser calendars of interest.
Once you have clicked browse calendars of interest, you will get these options:
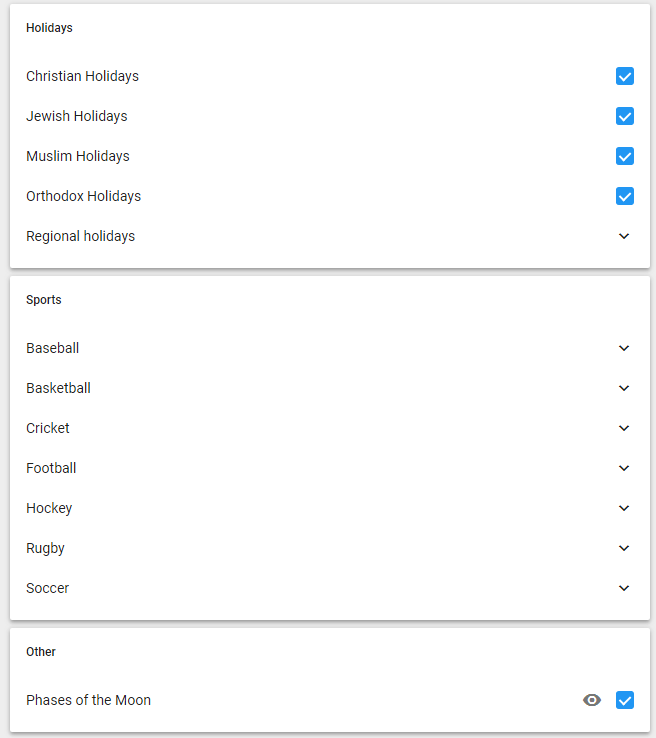
Each of these has a drop down menu and there are LOTS of sub options. If I were building out my own Merch Calendar, I would select each and every one of these.
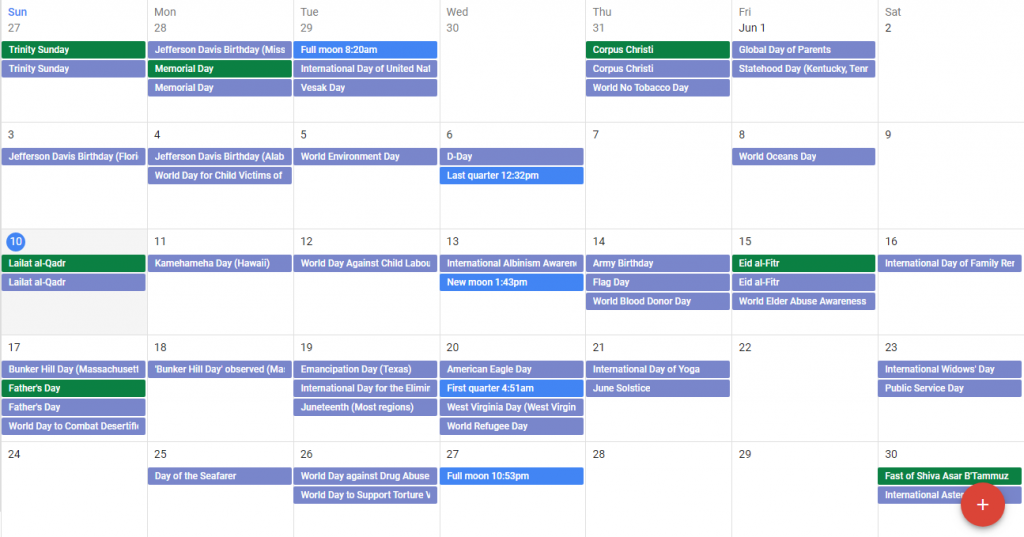
Anything you select the checkbox next too will then start showing up in your Google Calendar! Since there are tons of holidays, sports, regional holidays and more, each one of these events will begin showing up. You will then be able to take a look in advance of what is coming up and plan your designs around your Merch by Amazon account.
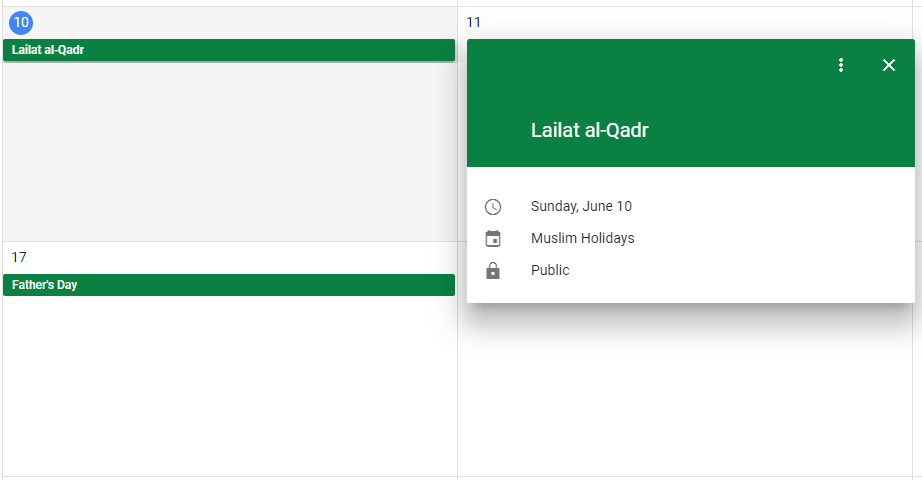
As an example, since I have selected Muslim holidays, these now show up. This is ALSO a great way to find niches you were not familiar with before:
Step 4: Change Notifications
If you would like to be notified at specific times for upcoming events (that you just added to the Merch Calendar), simply click on settings in the upper right hand corner, and then in the left hand menu, click on your calendar (it might be your name).
Scroll down to your notifications and you can begin changing the settings like this:
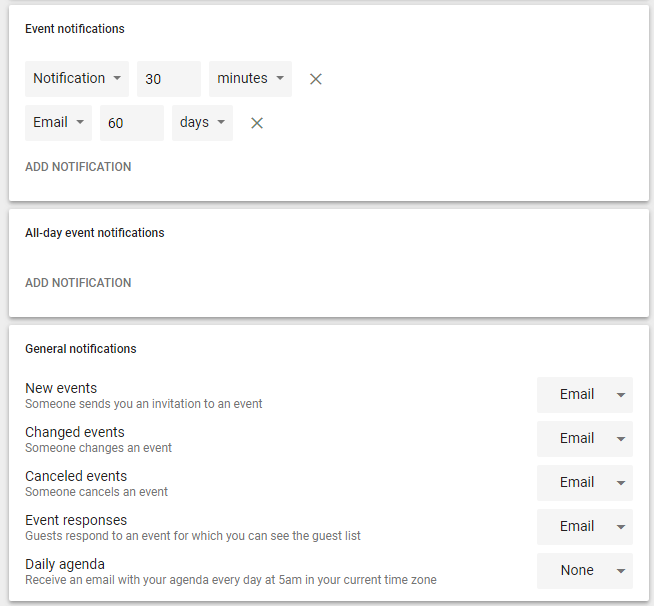
You can have it email you whenever you would like.
Step 5: Adding MORE Events (Stepping It Up A Notch)
In order to add even MORE events to your calendar, I have gone ahead and created a file that will let you import 400 different events and holidays from all over.
In order to set this up, click on your settings in the upper right hand corner, and click on Import and Export:
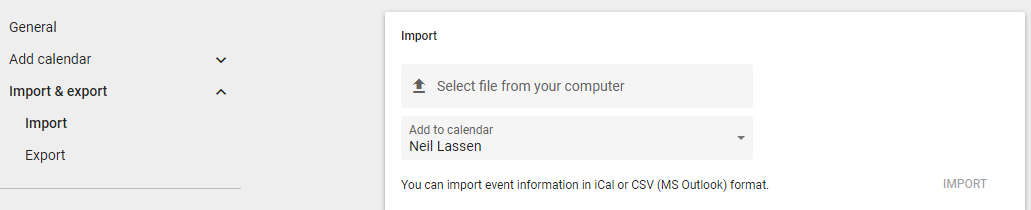
You will need to download THIS FILE HERE. So click on that link and download the CSV.
From here, click on the box to select a file from your computer. Select the file that you just downloaded.
Click on Import.
You will then get this notification:
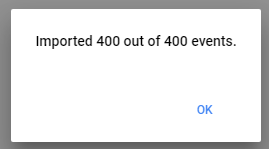
And just like that, your Merch Calendar is now FULL of awesome material for your designs.

Wrapping It Up
Again, a big huge shout out to Josh Brown with his original video and permission to write this method up. For those who have not used Google Calendar before, this tool is both FREE and incredibly valuable for keeping your life organized (and now your Merch life as well!).
If you are more of the video type, here are the general directions in video form from Josh:


Thank you so much, Neil :3
Together Everyone Achieves More!!
dope! done and thank you!
Do you know how we can get that CSV for 2019?