How To Resize Hoodies For Merch By Amazon

Now that almost everyone has access to sweatshirts and hoodies, you have probably noticed that hoodies take a different dimension image! Of course, Amazon has not given us an easy way to resize these within the Merch program, so we are stuck figuring out the most efficient way to do it ourselves.
For those that only have 10-25 designs, you could easily just resize them yourself in whatever image processing program you use. For those of us that have thousands or even tens of thousands of images to resize, resizing can become a much bigger chore.
There has been a lot of different methods and tools created for the community and each of them seems to have their flaws. My friend Josh Brown came up with an excellent automate action for Photoshop, but it would let you resize each image before it auto saved it. This sped up the process, but still was not as quick as I would like it to be with so many images to resize. If it were not for this original process that he shared, I would have probably just outsourced this.
Instead, I will share a 100% FREE method that will automatically resize all of your images into the correct dimensions for hoodies without stretching or distorting your graphics.
How To Resize Merch by Amazon Designs For Hoodies
This is going to be a short article because there are only a few steps you need to follow. Let’s get into it.
Step 1: Photoshop

You will need Photoshop. Since PS is a paid tool, it is great that they have a 7 day FREE trial. The free trial works for this method so you will not have to pay a dime to use it.
Download Photoshop here: http://www.adobe.com/products/photoshop.html
Step 2: Create 2 Folders
For this method, you will need two folders. The first folder should be filled with all of the designs that you want to resize. The second folder is simply a folder for all the resized designs to be automatically saved.
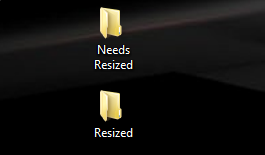
Pretty simply right? I just put these 2 folders on my desktop.
Make sure to fill up the folder with designs that you want to get resized!
Step 3: Download The Hoodie Resize Script
My good friend Greg Hesp was a huge help here. I am not a very good designer and self admittedly can barely use Photoshop. He fixed the issues I was having previously and created this script that does all the magic behind the scenes
Download the hoodie resize script here: https://merchinformer.com/wp-content/uploads/2018/01/Hoodie-Resize-1.zip
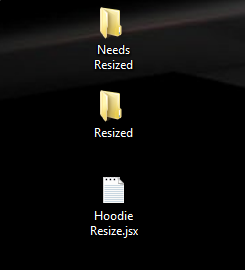
Once you have downloaded this file, unzip it to your desktop. You can use 7zip or Winrar to unzip this file.
Once the script is on your desktop, it should look like this:
Step 4: Run The Hoodie Script
Now that you have your 2 folders and your hoodie resize script, it is time to get everything running!
Right click on the “Hoodie Resize” script, and click open with. You will want to select Photoshop:
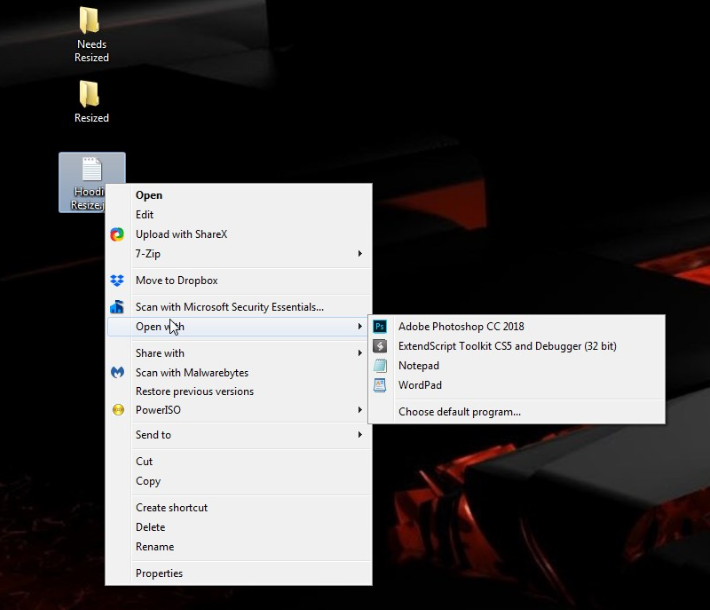
Note: If you do not see the Photoshop option there, click on “choose default program” and search for Photoshop. Select it.
Photoshop will then open and resize any 4500X5400px images to the 4500X4050px image required for hoodies. It will also scale down the image without causing any stretching or distortion like many of the other solutions out there.
The best part is, it is all FREE!
If you have any questions on the process, make sure to drop them in the comments below. Until next time, keep on Merching!


OMG Neil!!! That is Awesome!! Will save HOURS of time!! Love it!! Thank you sooooooo much!!!
Worked like a charm! Thank you SO much for sharing this. This is a HUGE time saver!
Hi Neil
Thanks for sharing this. I made something similar but with a Photoshop action and using Batch in order to go over my folder and after testing the script, the results are almost the same but I was wondering if is there a way with the script to fit the image to the 100% of the canvas without transparent pixels in order to get a bigger image for the hoodies without blank space.
Thanks in advance!
P.S.: I can share with You the action+instructions if You want
Hey,
Long story short, we used Actions for this, but it causes a load of problems based on the way PS interprets pngs. Actions also use local use settings in Photoshop, which also causes problems.
PS also converts pixels when resizing into percentages for some bizarre reason, and again this causes scaling issues when sharing between people.
The script lets you take complete control over PS user settings, and the quickly restore them back to what they were set to after the script is complete.
At the moment, the script will scale the image so that it fits height ways. What it doesn’t currently do is figure out the size of the populated pixel space and make a decision to resize it based on if its height is already less that 4050px.
I’m trying to work on this, but as you can imagine, trying to get the pixel space, as well as to do the maths to align it via scripting is a little complex.
Hope that helps!
PS. Code maker here!
First of all – awesome work with the code! Really slick. Not to hijack this thread, but I have a batch of designs that are 1440×1728. Is it possible to modify the hoodie script to batch resize my 1440×1728 PNG files to 4500×5400 PNG files? Thanks in advance!
This is not really possible as it will blow up the design by around 4 times and might get rejected for low quality by Amazon.
Neil,
Can you use this script for Photoshop Elements 7 or 15? I have both and was hoping the script would work with them as well.
Thanks!
Michal
I am not sure if this will work on those. This script was built for the newest version so you should just give it a try.
Thank you so much! I had another one, an Action, but this is easier and faster. Thanks so much
This is great, Neil! Do you mind if I share this in my Photoshop group?
Go ahead!
GRR I get an error..the system cannot find the file specifed .. i have a file on desktop “Needs Resized” and “Resized” what did i do wrong i am using cs6 ver 13.0 x32
Download the newest version of Photoshop from the website and use their free trial.
Hi! Neil
Thank you so much! Can I make the name of the file shorter?
Every resized file got this “as Smart Object-1-Hoodie” phrase at the end.
It should be the name of your file and then -hoodie. So it completely depends on what the name of the file is.
It’s the same error I get. It adds ‘as Smart Object’ to the file name even I don’t have that in the original file
Are you using the newest version of photoshop?
Great, works for me and saves time – thank you
Thank You so much for the information!
Thanks Neil! VERY helpful!
Thanks so much for taking the time to do this for us. I have a Mac and I’m wondering if anyone has success using this method on a Mac. I can’t seem to extract the code file. Thanks!
Thank you! Works great. Had no problems using it.
Love this but would love one that does NOT center the art after resizing…
Thank you, this worked perfectly with my Mac!
Dude……Your Rock Neil!!!
It’s not working on PS 2018 v.19.1.2 (latest release on CC for windows)
Photoshop opens and asks for the folder with the pngs to be resized and then does nothing.
After you select the folder with the pngs to be resized, does it ask you where you want to save it? The creator of the script actually made it on that version of PS.
This is great! The only thing I’m wondering is why it saves at 72 dpi. Are people using the 72 dpi file on Amazon with no quality issues?
Are you using merchresize.com? Hoodies recently got added to this site and is much easier.
I wasn’t, no – thank you so much! Works like a dream!
Hey Neil,
I just tried the resize script, but for some reason it does not work. I used the last PS Version from
the adobe website (free trial). But when I start the script, I can only choose the folder of the psd files but not the folder where the resized files should be saved. It seems as if the script stops after choosing the first folder. Maybe you can help me out. Many thanks!
The easiest option would be to use: https://merchresize.com/
Thanks Neil. That works pretty well…and fast!!
HOLY MOLY!
THANK YOU, i knew someday i could need this.
So i came back to try this method to change hundreds of files. Lovely 🙂
Saved me LOADS of time.
Glad im subscribed to your service this long and supporting merch informer 🙂
I really wish I could get this to work. I couldn’t find 7zip or Winrar in apps. I unzipped then when I right clicked it didn’t say Open With… ugh
https://merchresize.com/ would be a lot easier!
Hi there!
This tool is really helpful. I would like to change something in the script. My question is: is it possible to give photoshop a command that the png file is always at the same height what i want? Because now the graphic is always exactly in the middle of width and height. But i want the graphic to be like at 520 px in height. Is this possible?
Greets and big thanks.