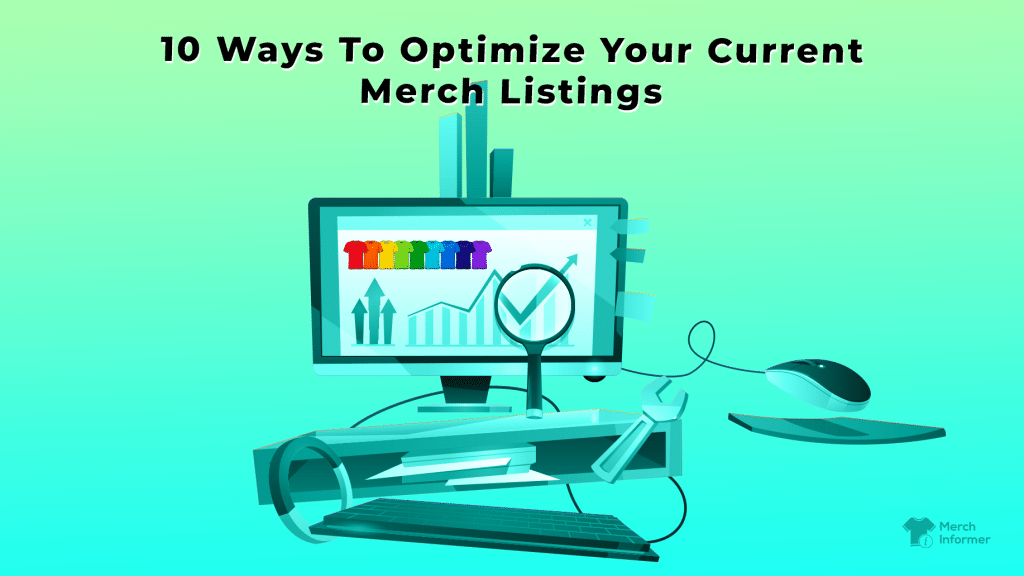
10 Ways To Optimize Your Current Merch Listings
With buyers around the world using Amazon to search for products three times more than they do on Google, optimizing one’s merch listings is critical to making sales. But what is the pinnacle of a search listing? How do you make the most of your research to combine it into one unified whole that’s attractive for buyers and leads them to the much-coveted Buy Box? It may seem like going down a rabbit hole, but it’s not too complex if you streamline it into several components.
In fact, the marketplace’s product listing can be broken down into eight different ingredients. Although we’ll cover each of these in more detail below, we’ll also throw in a couple of other good suggestions and best practices to follow based on some of the top-selling merchants and product listings on Amazon.
But before we do that, let’s take a quick look at what listing optimization actually is.
What Is Listing Optimization?
Simply put, listing optimization on Amazon is a process. What it entails is customizing and adjusting your product listing. The purpose is to get you ranking as high on Amazon’s search results as possible. While the Amazon algorithm for search remains shrouded in mystery, there are some key areas that you can develop in your listing, and these will help you earn more sales. Ultimately, it’s the way you build the front- and back-end of listings.
10 Steps To Optimize Your Merch Listings

1. Write Powerful Product Titles
The product title is a prime piece of real estate when it comes to listings. It is ideal for including keywords as well as a brand/maker, and it helps to give the listing a more complete feel. This is what your customers are ultimately after – as much information in as short a space as possible. And the space you have is, indeed, quite short. While Amazon permits a product title length of 250 characters, most Sellers are opting for the under-200 character count limit. This is possibly because of Amazon’s “suppression rule”, which basically suppresses titles of listings that go beyond the 200 mark.
Now, here are some of the tips you may want to follow with your title: avoid using capital letters throughout the entirety of your title but capitalize the first letter of each word. Don’t use ampersand symbols (&) but rather stick to “and”. For an optimal experience, use dashes (-) or pipes (|) to break up keywords. (For more on keywords, check out what we have to say below). If you use numbers, go for numerals and not words. In addition, avoid including price and quantity, do not use temporary promotional messages such as “sale” or “discount”, and don’t use special symbols such as the trademark or copyright marks. Also, to be avoided is keyword stuffing, including adjectives like “awesome”, or mentioning things like free shipping.
Ultimately, the title should address the user intent and align with your audience’s needs. According to Amazon, one of the best structures you could use is this: [Brand] + [Sub-Brand] + [Model Number] + [Size] + [Product Description] + [Defining Features]
2. Choose Your Categories Carefully
Choosing the most precise and narrowly defined product category for your merch listing needs to be done carefully. The reason is that buyers who search for products tend to be directed to specific categories, so if you aren’t in the right category, sales will fall flat.
One crucial tip here is to look at your competitors’ BSR position. Knowing where they stand, you’ll be in a better position to make it to the right category and stand a greater chance of getting seen.
Note: If you are a Merch by Amazon Seller, the category is automatically selected by the products you pick.
3. Use High-Quality Product Images
Because your customers have no other way of interacting with your product apart from the images you provide, you need to use professional-grade images – both for the main image and secondary images. The image dimensions should be 1,000 x 1,000 pixels with an average of five to six images.
For the main image, make sure the product takes up around 85% of the frame and is centered, well lit, falls against a white background, is easily recognizable, and appears in an attractive way. It should not include other items with it such as accessories or boxes.
Backgrounds should be neutral and the images need to give your customers a feel of what to expect when they hold the product in their hands. Opting for various angles for the secondary images is one way of doing this. Other options you have are highlighting the product’s features through the use of lifestyle or environment backgrounds, or emphasizing packaging and special features.
Note: If you are a Merch by Amazon Seller, you only need a single image and Amazon does the rest, your design!
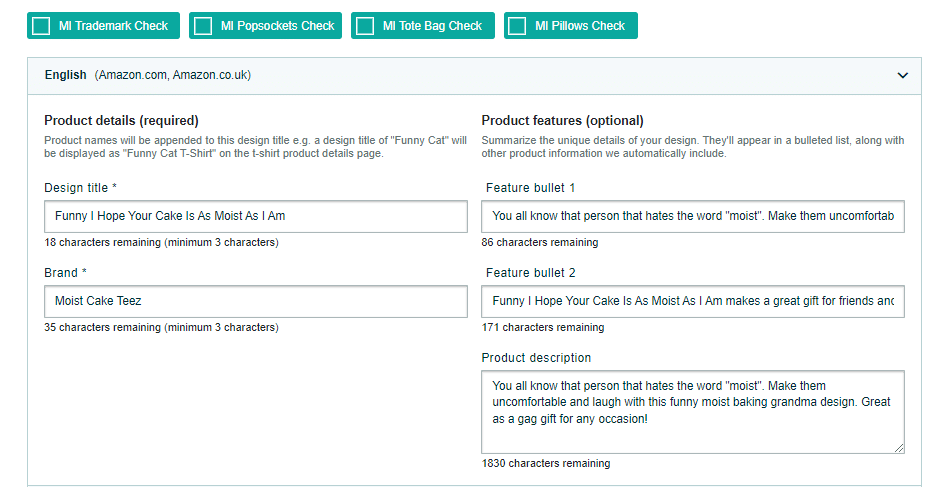
4. Prepare Detailed and Informative Product Descriptions
The product descriptions contain the “meat” of your merch listing. Why? Because this is where you’ll end up writing the most. You’ve got a 2,000 character limit that you can optimize to its full potential by providing the customer with as much information as possible.
Some tips from the pros include: describe the ways in which the product can be used while being factual and not over-promising. To be avoided are time-sensitive terms like “sale”, including shipping or promotional information; including an email or web address; and using special symbols or characters.
5. Select Relevant Keywords
As promised, we now get to the juicy stuff – keywords. This can be a tough one to nail down, but it doesn’t mean it’s not worth trying. Important to note at this point is that Amazon uses two sets of keywords: the ones that are customer facing (primary keywords) and those that they don’t see but still help guide them to your product (hidden or back-end keywords).
When conducting your keyword research, you need to look at product types and what you ultimately want to call your product. If you start out with a core word search, you’ll easily be able to see what’s available. Other elements to look out for are descriptions or keywords of features and benefits, as well as related terms.
Note: If you are a Merch by Amazon Seller, the only place to put your keywords is the title, brand, bullet points and description. Focus most on the keywords in your title and bullet points while being descriptive as possible on what the design is.
6. Avoid Duplicating Product Pages
This goes hand in hand with the parent-child relationship of products. For example, if you have a t-shirt that’s available in blue, black, and white, you don’t need to create separate pages for these color variants. The same holds true for different sizes. This will help you avoid duplicating content and customer confusion as well as help them find products more easily.
Note: As a Merch by Amazon Seller, you do not have to worry about this!
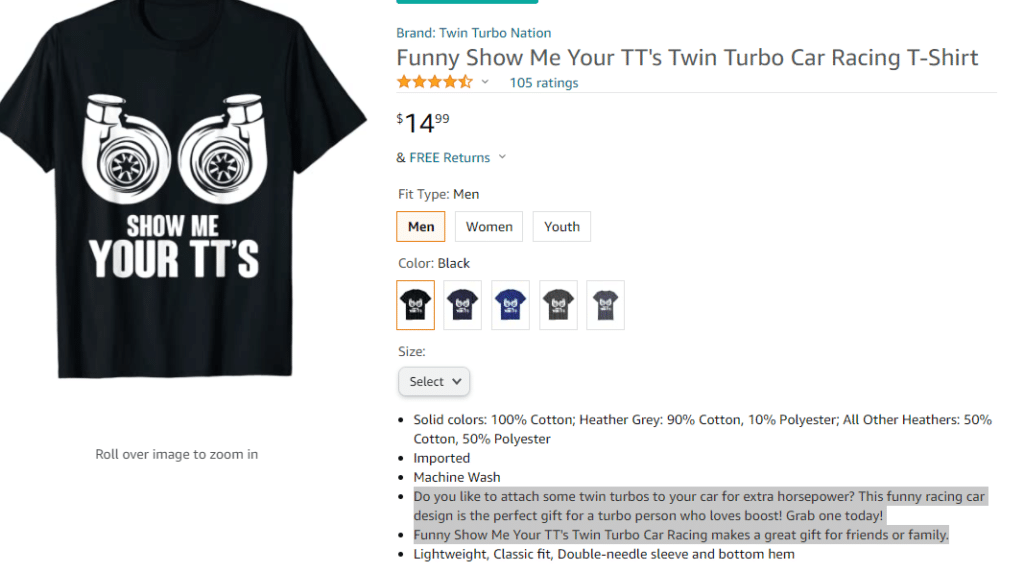
7. Emphasize Your Key Features And Benefits
This part is a must for any Seller to get their customer’s attention. A good tip to follow is to order your features in a hierarchical order with the most important features first followed by the less important ones.
Also, worth mentioning is avoiding keyword stuffing and using the bullet points that you’re allocated. Including a call to action will also increase chances of making a sale.
To be avoided is mentioning information about shipping and using subjective terms such as “great value”. You’ve got plenty of characters. Use them.
8. Optimize For Mobile
This means keeping your character count to a minimum while displaying the most crucial information to customers who may be browsing Amazon on their mobile devices.
9. Promote Engagement Through Reviews And Ratings
Sellers that have multiple reviews are likely to get that “trust” factor that much faster than those that don’t. This is why getting reviews and ratings is a big one. There are several ways to go about doing this. For example, if you receive negative feedback, it’s crucial to address it in a timely and polite manner. If you have several negative reviews, try to get to the bottom of things and use them as an opportunity to improve.
The reviews and ratings are divided into the number of positive (and negative reviews) as well as a rating system of five stars (five is the highest and one is the lowest). The number of reviews can also signal excellent customer service, which is a crucial factor for Amazon.
One way to encourage these is by adding parcel inserts in your packaging to request reviews from your customers. Remember though: Amazon doesn’t allow Sellers to offer rewards in return for reviews. Reviews need to be genuine, so getting in touch with your customers via email is one way of achieving this goal.
Note: Merch by Amazon Sellers need to wait for reviews. Amazon will email the customers on your behalf asking them to review their purchase.
10. Price Competitively
Amazon’s A9 algorithm will look at the way in which you price your products. It will not only display top-selling and relevant products, but also determine their price appropriateness by comparing it to the best price in that group.
So, the tip here is really to be sensible and look at similar products to determine your pricing.
How Can Merch Informer Help You Optimize Listings?
While some merch is easier to optimize than others, these are the 10 essential features of optimization that you’ll want to focus on. If it seems like a lot of effort, don’t worry. You’re not alone. There is a way to get all the help you need. This is because with Merch Informer, you can take care of each of these components with a few clicks of a button.
Optimizing your listings will ultimately lead to more reviews, higher-rated reviews, more sales, and better profit. So, it’s really worthwhile investing in the right software.
Try Merch Informer for free with our 3-day trial, or buy a subscription for as little as $9.99 per month.